English


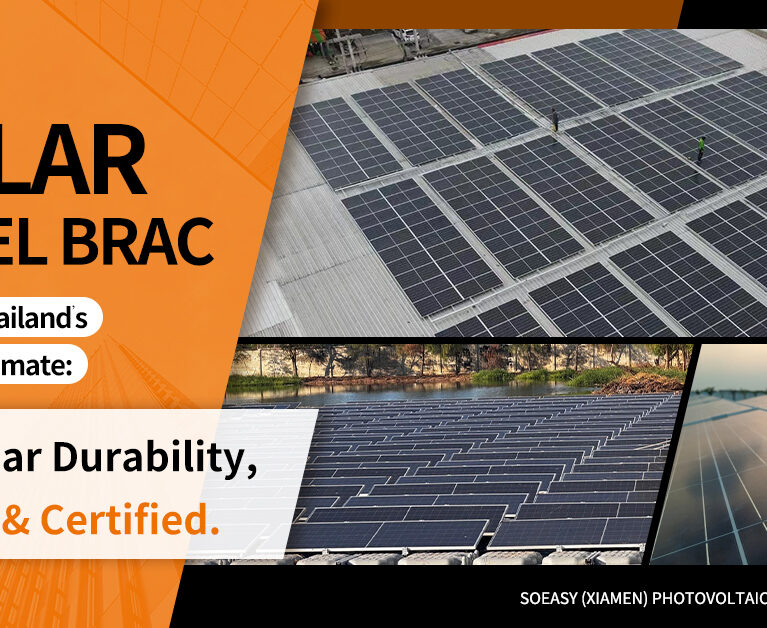
Corrugated metal roofs are a common sight across industrial facilities, warehouses, agricultural buildings, and commercial complexes. They offer durability, longevity, and cost-effectiveness. However, when it comes to installing rooftop solar systems, these roofs present a unique challenge: how to mount the PV array without compromising the roof’s waterproof integrity.
Traditional penetrating attachment methods—drilling through the metal panels to secure L-feet or hooks—create holes that can lead to leaks, rust propagation, and voided roof warranties. Even with sealants and flashing, each penetration is a potential failure point over a 25-year solar project lifecycle.
The solution? Non-penetrating mounting systems. These innovative approaches secure solar arrays using clamps, ballasts, or hybrid methods that leave the roof surface completely intact. For clients who prioritize roof integrity, warranty preservation, and long-term reliability, non-penetrating solutions are often the only acceptable choice.
This article provides a comprehensive guide for customizing non-penetrating corrugated metal roof solutions for clients—covering roof assessment, engineering principles, component selection, and best practices.
Understanding Corrugated Metal Roofs
1. Roof Profile and Structure
Before designing any mounting solution, you must fully understand the client’s specific roof characteristics. Corrugated metal roofs are not all the same.
Key parameters to document:
- Profile shape: Common profiles include trapezoidal (most common), sinusoidal (wavy), and box rib. Each has different clamping surfaces and load-bearing capacities.
- Rib spacing (pitch): Distance between adjacent peaks. Typical values range from 76mm to 150mm (3 to 6 inches), but some industrial roofs may have 200-300mm spacing.
- Rib height: The vertical distance from valley to peak. Common heights range from 18mm to 75mm. Taller ribs provide more vertical space for clamps but may require longer hardware.
- Material thickness: Typically 0.4mm to 0.8mm (22-26 gauge). Thinner panels are more prone to denting and require careful load distribution.
- Substructure: The purlins or zee-channels beneath the metal panels. Their spacing (typically 1.2m to 1.8m) determines where loads can be transferred to the building structure.
2. Challenges in PV Installation
Installing solar on corrugated metal roofs presents several specific challenges:
| Challenge | Description |
|---|---|
| Waterproofing integrity | Every unnecessary penetration increases leak risk. Non-penetrating solutions eliminate this concern entirely. |
| Inconsistent profiles | Different manufacturers use different rib heights and spacing. One clamp does not fit all. |
| Wind load concentration | Wind uplift forces concentrate at roof edges, corners, and ridges. Non-penetrating systems must resist uplift through friction, clamping force, or ballast weight. |
| Panel flexibility | Thin metal panels flex under load. Point loads from concentrated ballast or narrow clamps can dent or deform the panels. |
| Thermal expansion | Metal roofs expand and contract significantly with temperature changes. The mounting system must accommodate this movement without loosening or stressing the panels. |
Non-Penetrating Solutions: Key Principles
There are three primary approaches to non-penetrating solar mounting on corrugated metal roofs. Each has its strengths and ideal applications.
1. Ballasted Mounts
Ballasted systems use concrete blocks, steel trays, or composite weights to hold the solar array in place through gravity alone. No attachments penetrate the roof.
How it works: Weights are placed on the roof surface, supporting rails or pre-assembled frames that hold the solar modules. The combined weight of ballast, rails, and modules must be sufficient to resist wind uplift forces.
Advantages:
- Truly zero roof penetration
- Completely removable—ideal for leased roofs or temporary installations
- No special roof profile matching required
- Fast installation once ballast is staged
Disadvantages:
- Significant additional weight (typically 15-25 kg/m² or 3-5 psf)
- Requires structural engineering verification of roof load capacity
- Not suitable for roofs with limited load margin
- Ballast can shift under seismic or extreme wind events if not interlocked
Best for: Flat or low-slope corrugated roofs (up to ~10°), roofs with high structural capacity, and projects where roof penetration is strictly prohibited.
2. Clamping to Corrugations
Clamp systems attach directly to the roof’s ribs (peaks) or valleys using specialized mechanical clamps. No drilling required—the clamp grips the metal profile.
How it works: A two-piece clamp sandwiches the roof rib between a top plate and a bottom jaw, tightened with a bolt. The clamp then supports a rail or directly attaches a module.
Advantages:
- Lightweight—no ballast needed
- Lower structural load on the building
- Clean appearance with no visible weights
- Suitable for higher slope roofs (up to 45°+ with proper clamp design)
Disadvantages:
- Requires clamps specifically matched to the roof profile
- Clamp gripping force must be carefully calculated to avoid crushing or slipping
- Metal-on-metal contact may require isolation pads to prevent galvanic corrosion
- Installation is slower than ballasted on large, simple roofs
Best for: Steeper roofs, roofs with limited load capacity, and projects where aesthetics matter.
Steps to Customize the Solution for Clients
Delivering a successful non-penetrating solution requires a systematic, client-specific approach. Follow these five steps.
Step 1: Roof Survey and Measurement
Before designing anything, conduct a thorough on-site or remote survey.
What to measure and document:
- Roof profile dimensions: rib height, rib spacing (center-to-center), valley width, panel thickness
- Roof slope (pitch) in degrees or percentage
- Substructure: purlin spacing, orientation, and material (steel, aluminum, wood)
- Roof condition: existing corrosion, previous repairs, paint condition
- Obstacles: vents, skylights, HVAC units, parapets, walkways
- Roof orientation and available area
Pro tip: Use a profile gauge or take detailed photos with a scale reference. If possible, request a small sample of the roof panel from the client or manufacturer for clamp testing.
Step 2: Load and Wind Calculations
Engineering is non-negotiable. Non-penetrating systems must withstand the same wind and snow loads as penetrating systems—without mechanical anchors.
Key calculations:
- Design wind speed per local building code (ASCE 7, Eurocode 1, etc.)
- Uplift pressure at roof zones (interior, perimeter, corner, ridge)
- Required ballast weight or clamp clamping force to resist uplift
- Friction coefficient between ballast/roof and clamp/metal (typically 0.3-0.6)
- Roof structural capacity to support ballast weight (if using ballasted system)
For clamp systems: Calculate minimum clamping force = Uplift force × Safety factor (≥2.0) / Coefficient of friction.
For ballasted systems: Required ballast mass = Uplift force × Safety factor / (Gravity × Friction coefficient). Add 10-20% margin for long-term settling and moisture effects.
Step 3: Selection of Mounting Components
Based on the survey and calculations, select the appropriate components.
| Component | Options | Selection Criteria |
|---|---|---|
| Clamps | Top-clamp, side-clamp, bottom-clamp styles; fixed or adjustable jaw | Must match roof rib dimensions; material compatible with roof metal |
| Rails | Aluminum (standard), steel (higher strength), mini-rails (low profile) | Span between supports determined by purlin spacing and snow load |
| Ballast | Concrete blocks (standard), composite trays (lighter), steel weight bars (compact) | Weight per block, interlocking feature, ease of handling |
| Fasteners | Stainless steel bolts, anti-vibration washers, nylon isolation pads | Corrosion resistance; galvanic isolation between dissimilar metals |
Material selection guide:
- Roof metal + Mount components: Avoid galvanic corrosion. Aluminum clamps on steel roofs require isolation pads. Stainless steel (304 or 316) is safe with most metals.
- Corrosive environments (coastal/industrial): Choose stainless steel 316 for all clamps and fasteners, or Zn-Al-Mg coated steel components.
- Standard environments: Anodized aluminum clamps and rails are cost-effective and durable.
Step 4: Modular and Pre-Assembled Options
To reduce on-site labor and minimize installation errors, specify modular and pre-assembled components.
What to look for:
- Pre-assembled rail sections: Rails with clamps pre-installed at factory-set spacing
- Ballast trays with integrated rail mounting: No separate rail-to-tray connections
- Pre-cut rails: Cut to exact lengths based on array layout
Benefits for your client:
- Faster installation (lower labor cost)
- Less rooftop cutting and drilling (safer)
- Consistent quality (factory-controlled)
Step 5: Client-Specific Adjustments
Every client has unique priorities. Tailor the solution accordingly.
Client questions to ask:
- Is roof warranty preservation the top priority? → Prioritize pure ballasted or high-quality clamp systems with protective pads.
- Is roof structural capacity limited? → Use clamp-only or hybrid systems with minimal ballast.
- Will the system need to be relocated or removed in the future? → Choose modular ballasted or easily unbolted clamp systems.
- Is the building in a very high wind region (typhoon-prone)? → Use hybrid systems with perimeter clamps plus interlocking ballast.
- Does the client want the lowest possible upfront cost? → Standard clamp systems are typically the most economical non-penetrating option.
Best Practices for Non-Penetrating Installations
1. Ensure Even Load Distribution
Non-penetrating systems transfer loads to the roof through contact surfaces. Uneven distribution can cause denting, panel distortion, or localized overload.
- For ballasted systems: Distribute ballast weight across multiple ribs, not single points. Use continuous ballast trays rather than individual blocks where possible.
- For clamp systems: Size clamp jaws to match rib width. Use load-distributing pads or gaskets under clamp contact surfaces.
- Avoid ridge and eave overloading: Reduce ballast or clamp density near roof edges unless specifically engineered for those zones.
2. Material Corrosion Protection
Roof environments can be harsh. Protect your client’s investment with proper material selection.
- Coastal areas (within 1 km of saltwater): Use stainless steel 316 for all clamps, bolts, and washers. Aluminum components are acceptable if anodized ≥15μm and isolated from steel.
- Industrial areas (chemical plants, fertilizer storage): Upgrade to stainless steel 316 or Zn-Al-Mg coated steel.
- Standard environments: Anodized aluminum (≥10μm) or galvanized steel with powder coating is sufficient.
- Isolation requirement: Always place rubber, EPDM, or nylon pads between dissimilar metals (e.g., aluminum clamp on steel roof).
3. Easy Maintenance and Inspection
Design for the long term. A system that is difficult to inspect is a system that will not be maintained.
- Accessible fasteners: Ensure all clamp bolts can be reached with standard tools. Avoid placing bolts in recessed locations.
- Removable sections: Design array layouts with walkways or removable rows to access roof penetrations, skylights, or equipment.
- Clear labeling: Mark clamp torque specifications on the system or provide laminated cards for maintenance crews.
- Inspection intervals: Recommend annual inspections. Provide a simple checklist to the client.
Delivering a Safe and Client-Focused Solution
Non-penetrating corrugated metal roof solutions offer a compelling value proposition for clients who want solar without compromising their roof’s integrity. By eliminating penetrations, these systems preserve waterproofing, maintain roof warranties, and reduce long-term leak risk.
However, “non-penetrating” does not mean “non-engineered.” A successful solution requires:
- Thorough roof characterization – profile, pitch, substructure, condition
- Rigorous load and wind analysis – tailored to local codes and site conditions
- Careful component selection – matching clamps to profiles, materials to environments
- Client-specific customization – balancing cost, weight, wind resistance, and future flexibility